Yoga is increasingly popular in the western world, which is mainly a stretching and strength exercise. When people consciously make an effort to do yoga on a regular basis, they get lots of stretching into their routines. But if you usually focus more on weight lifting or cardio workouts, you might be missing out on some essential stretches that will make all the difference in your physical (and mental) health.
Why Stretching Is So Important
Stretching before and after your workout is crucial to your body’s overall development. When you stretch after you exercise, holding a pose that stretches out your muscles and tendons can greatly improve your overall joint movement, range of motion, and mobility. That’s why people often comment that they are sore after a workout.
When your muscles are sore, that means they’ve been worked but haven’t been loosened. They’ve gotten too tight and have been stretched beyond their limits. The good news is, you can push and expand those limits with daily stretching. When you take this proper care of your muscles and joints, you will see your results gaining speed…fast.
How Does Stretching Help Your Body Progress?
As with all body motions, stretching has specific anatomy behind it. When you stretch, you move inflammation out of your muscles and you improve blood flow.
You’ve probably heard the term warm-ups many times. But did you know that you literally warm your muscles when you stretch them out? The warmer your muscles are the more pliable and moveable they are, which means they’re more likely to work for you as you strive to reach your physical goals.
The Most Important Muscles to Stretch
The best way to think about which muscles you should be stretching is to divide your body into two crucial sections: the upper and lower body. Then you can go from there.
For the upper body, the most important muscles to stretch are:
- Shoulders
- Neck
- Lower back
For the lower body, you should be stretching these muscles:
- Calves
- Hamstrings
- Hip flexors
- Quadriceps (Quads)
These areas are so important to be stressing because they are the most critical muscles for movement and mobility. They also tend to be the most targeted areas to work out in a weight training session or even cardio workouts.
For any upper body workout, you will have to be using your shoulders and neck. While the neck is usually just used for stability (it’s never a good idea to propel any weight forward with your neck), it helps drastically with your posture during weight lifting. A tight neck can also lead to headaches, so that’s another reason to keep yourself from getting too tight.
Even though the lower back is technically part of the upper body, it’s an important bridge between the lower and upper areas. The lower back supports your lower body in classic moves like squats, lunges, and jumping. It can also stabilize your core, which you use in activities like cycling and running or jogging.
As for the lower body, we’ve selected these muscles as key stretching muscles since they are your most used muscles for any leg exercise. Even if you are not consistently working out, you still use all these muscles in daily activities like standing, walking, bending over, and going upstairs. For those who spend the majority of the day sitting in the office, stretching these areas is especially critical.
The effects of a sedentary lifestyle are often not noticed until you get older, but many people do not realize they could seriously decrease those risks and effects by simply stretching 4-5 times per week. By following our stretching exercises routine, you could avoid severe lower back pain, knee surgeries, and plenty of other common ailments that plague older people.
The Best Stretches for Great Results
We’ve compiled a list of the best stretches that you can do in just 10 minutes every day.
Why 10 minutes? If you want to see real changes in your habits that lead to long-lasting changes in your body, you need to start with a reasonable goal. Those who start with large, ambitious goals that drastically change their current lifestyle are much less likely to stick to those goals. Assigning a small, reasonable change for yourself will cause you to truly adjust to the new routine and continue building on it as time goes by.
But for now, stick to 10 minutes a day.
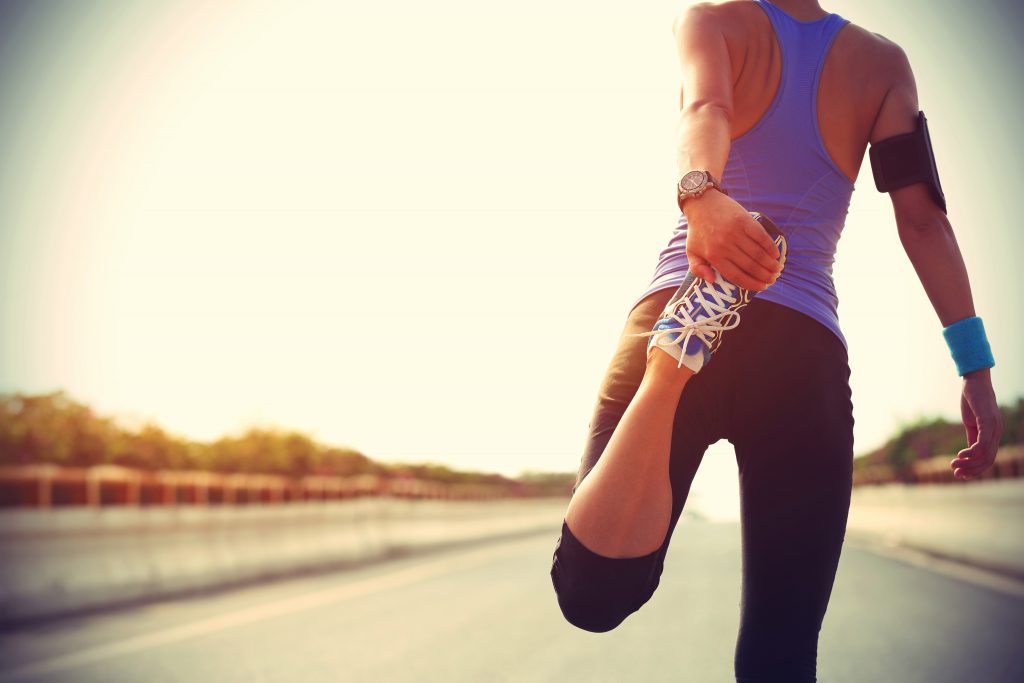
Lying Hamstring Stretch
The hamstring stretch is great for your calves and hamstrings. To do it, lie flat on your back. Start with your toes pointing upward and your face to the sun. Slowly raise your right leg upward (while still fully extended). Bring it as far toward your face as you can, keeping it perfectly straight the whole time.
Use your hands to help pull the leg toward your torso. When first starting out, you may not be able to pull your leg very far. And that’s fine! Just try to bring it all the way up so it lands at a 45-degree angle. Once you’ve brought your leg up as far as you can, hold that position for 10-15 seconds, then slowly lower it back down.
Once you’ve finished that right leg, switch sides and do the same move on the left leg.
Things to remember: Be sure to keep your breathing even and steady throughout the stretch. Breathing is a vital part of stretching. Steady breathing not only helps you gain flexibility faster, but it also increases the mindfulness aspect of your stretch.
When we mentioned earlier that stretching can improve your state of mind, we weren’t kidding. But the best way to make that happen is through working on steady breathing through the whole move.
The Plank
This timeless exercise is sometimes used as a bodyweight exercise (which is a great thing to do), but it’s also a great stretch because it activates all your muscles. If you don’t have time to specifically target a quad stretch, loosen tight hamstrings, and complete some hip stretches, a plank is a simple but effective go-to. Not only does it build up your muscles and prep you for other, more intense workouts, it also puts all your main muscle groups under tension and gives them the chance to strengthen under that pressure.
Here are the basic steps to do the plank:
For starting position, place your arms and hands directly under your shoulders. Don’t push them too far out. Placing them in a little further is fine, it just makes the move a bit more challenging.
Position your feet so they are almost touching each other, but still slight apart. Raise your body up so that your arms are extended and the only thing touching the ground are your toes and hands.
While your body is in the air and you’re holding the position, remember to keep your body straight. Don’t slump or dip your back, and don’t arch your back, sticking your butt in the air. Both detract from the effectiveness of the stretch.
Hold the plank for at least 30 seconds. If you can’t quite make it to 30, there is an easier rendition you can do until you build a bit more endurance. Just rest your elbows on the ground instead of just your hands. With the help of your elbows, you’ll support some extra weight, allowing you to keep the 30-second rule.
Once you’ve done the easier pose for a few days, try to complete it in the standard plank position. It’s the best way to keep your progress moving forward without hitting a plateau.
Runner’s Lunge
The Runner’s Lunge works your hip flexors, which improve the overall movement of your hips and waist and loosen your legs. They also get your hamstrings.
The runner’s lunge is a bit different than the standard lunge. In this one, you won’t be in a vertical position so much as a lateral. To do it, you’ll start in standing position, but you’ll end with your hands on the ground.
After starting position with your feet shoulder-width apart, take one giant step forward with your right foot, so that your right leg moves as far forward as it can, while still holding your left foot in its beginning position. Reach down and balance yourself with the tips of your fingers.
To get an idea of what this looks like, line your shoulders up with your right knee, and your fingers up with your front ankle. Your head should be directly above your shoulders and knee. The left foot should be balancing on its toes, with the right thigh facing downward. The left leg should be stretched out, but with the knee just slightly bent.
You’ll want to tilt your torso forward slightly and squeeze your glutes. Hold this pose for 15-20 seconds. Then push yourself forward with your left foot and raise your body back up to the standing position. Do the motion with your other foot forward to evenly stretch everything out.
Downward Dog
If you’re not used to stretching you may be intimidated by classic yoga moves, but the Downward Dog is one of the most basic introductory moves. If you like it, you can always try out some more advanced yoga.
To do it, start on your hands and knees. Your shoulders should be directly above your hands and your hips should be right above your knees. Your ultimate goal will be to move up into the shape of an inverted V. So start out by pushing your knees up until you’ve gained enough momentum to straighten them completely. As you move your butt up, you’ll move your slide your arms forward. Keeping them on the ground, move them forward, past your head, until your forearms are aligned with the tops of your ears.
As you go into the climax of the pose, tuck your toes directly under your body with your feet together. Keep your spine straight – make sure you don’t dip it in or bend it in a hunch. Engage your core while you’re doing the move. That should help you stay focused and keep your spine straight.
Spread your fingers apart. When your fingers are spread it allows your body to relax, rather than making any clenches motions. Your weight should be evenly distributed across your body during Downward Dog. You’d be surprised what a difference the position of your fingers can have on this!
Hold this final position for 20 seconds, being sure to breathe deeply through the whole thing. When you relax the move, come back down to your hands and knees, or tabletop position.
The Cobra
This position is an excellent chest stretch and a way of opening up your core. If you’ve just worked out your abs, this will feel excellent as you loosen that core and feel the recovery pulsing through your muscles.
For the Cobra, start by lying with your stomach facing the ground. Your chest and stomach will be lifted off the ground in a straight line but your legs and feet will be lying on it. To lift your chest up, tuck your arms under your body so that your elbows are holding you in position, and the tips of your fingers are pointed past your head.
Move your chest up so it’s fully upright, even bending towards your back. With your elbows directly under your chest, pull your shoulders back and hold your head straight forward. Take deep breaths, feeling the pull in your core and the fresh air through your lungs.
While you’re inhaling, you can get the most of the breathing movement by pushing your toes strongly into the ground. Press through the bottoms of your feet, shoulder blades, and pubic bone and keep your neck loose (not stiff) the whole time you inhale. This should position should be held for 20-30 seconds.
When you’re finished, you’ll notice your shoulders feel much looser. After a while of adopting this move as part of your daily routine, the flexibility of your spine will grow stronger as well.
The Chest Opener
To further open up your chest and loosen your shoulders, do this simple move.
To start, go to the corner of the room where two walls meet. Place your hands and forearms on either one of the walls, with your face toward the corner. Specifically, your right hand will be on one side of the corner while your left hand is on the other. Start out by standing with your arms a decent width apart from each other.
The further away from the corner they are the more stretch your chest will get. Start at hip-width and move things outward the more you’re able to. Move your face in toward the corner, without moving your arms or your feet. The only thing moving here should be your upper body, slowly gravitating toward the corner.
As your body moves in, you’ll feel that opening of the chest you’re looking for. It’s good to hold the position for 30 seconds, but it can also be done as a variation of wall pushups, practicing strength training by building triceps and stretching your chest at the same time.
Total Amount of Body Stretch Time
All in all, this routine will only be about 5 minutes of actual stretching. However, as you get used to these stretching exercises, you will need that extra time to move between positions (and glance back at this article for a reference). It depends on how much time you have, but if you have an extra 5 minutes, consider repeating these body stretches one more time. That way you’ll get a full 10-minute stretch, which will significantly reduce muscle tension and get your body where you want it to be.
If you’re really short for time, a good strategy would be to repeat this daily routine twice each day, once in the morning and once when you come home from work in the afternoon. You’d be surprised how well this routine can help you begin your day and unwind after a long one.
But if it’s a challenge for you to make a bit of extra time in your day, don’t push it. We want you to reach your original set of goals to get the blood flow and relieve muscle tension so you can start noticing positive changes in your daily routine. Soon enough, you’ll be moving through the exercises quickly and will be hungry for more.