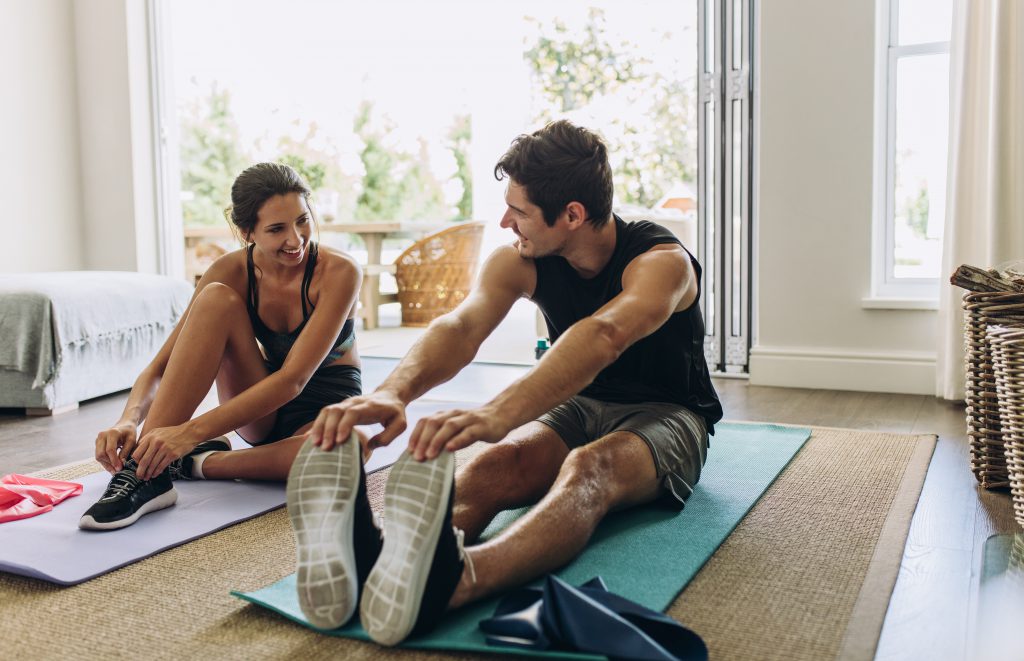
There’s so much pressure to have the perfect body. You see it on Instagram, in advertisements, and hear your friends talking about it non-stop. But where do you find the time to fit in your strength training? For most people, spending an hour at the gym is just not a reasonable option.
The good news is, you can still get a great-looking body without even going to the gym. That’s why we’ve put together this full-body workout that you can do at home, with no equipment. Here’s the best part: It will only take 10 minutes out of your day, instead of eating up hours of your precious time.
(Note: Want our elite trainers to build your workouts for you? Start your Fitplan free trial today!)
Here’s what we’re about to cover:
- Are Bodyweight Exercises Effective?
- How to Use Your Time Efficiently
- At Home Chest Workout
- Strengthen Your Biceps and Triceps
- The Core of the Matter
- Plank Variations for Optimal Results
- Legs, Legs, Legs
- How to Implement This Fitness Routine
Are Bodyweight Exercises Effective?
This is a question on a lot of people’s minds. They’re wondering if they’ll still reap amazing benefits without using heavy weights in an intensive program. The answer is simple. It all depends on your fitness goals. If you’re looking to build serious muscle and get into bodybuilding, you definitely need to start a weight-lifting routine.
But if you’re looking to get trim, burn some fat, and build overall strength and fitness, a bodyweight program is just right for you. Depending on how much you want to lose and how much time you have, pairing this workout with cycling or jogging (for cardio) will build the results you’re looking for. It’s always good to add a quick warm-up. Even something as simple as jumping jacks will do!
Use Your Time Efficiently
When choosing your daily workout routine, you need to be efficient when it comes to choosing your moves. In this area, your schedule is all about quality, not quantity. So make a thorough and smart plan ahead of time to make sure you target all the right areas.
To do that, think about all the main muscle groups you’ll want to reach to achieve a full-body workout.
Upper Body
- Chest
- Arms: biceps and triceps
Lower Body
- Core
- Legs: Hamstrings and glutes, quads
Each one of these muscle groups contains many small (and large) muscles, but putting them into main groups helps you plan out your workouts well. If you have 4 main groups you need to target, you can break that down and estimate that you’ll spend 2.5 minutes on each group. Et voila! Your total body workout.
At Home Chest Workout
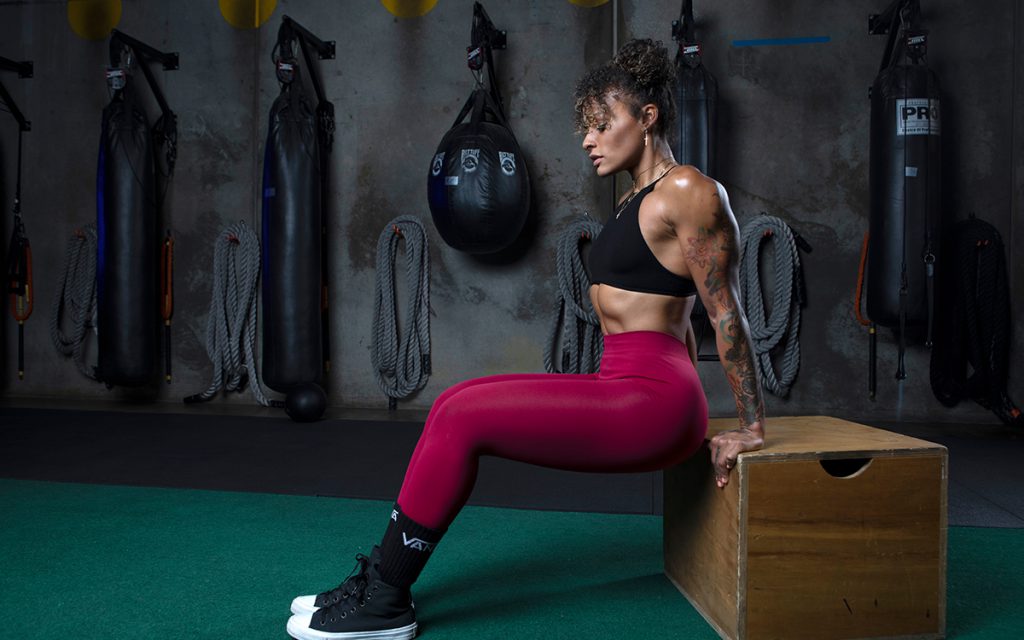
The best move to really strengthen your chest is the chest dip. They do help you build some arm strength as well, but when it comes to bodyweight exercises, there is no isolated muscle strengthening. And you don’t want that anyway. It’s always best to use compound exercises, especially when you’re working with a limited time frame.
While you don’t need any official gym equipment to do this exercise, you should use a bit of furniture you have at home. Find two chairs that are exactly the same height. You’ll want to make sure you secure them very tightly. You don’t want them coming loose or sliding beneath you while you’ve got all your weight suspended.
The best way to secure them is by putting them right up against something really solid – a sofa and a wall would both be ideal. You’ll even want to put something heavy on the seat of each chair. If you have extra dumbbells that could work, but if not, any heavy item will do. You could even use a friend or significant other.
Once you’re sure the DIY (Do It Yourself) dipping station is secure, you’re ready to do the move.
Place your hand’s palms down with a firm grip. Start by taking your feet off the ground so that you can’t use them to propel your body upward. Using your arms, slowly dip your body down until your elbows are at a 45-degree angle, then push yourself back up so your arms are fully extended.
While you’re doing the move, be sure to keep your arms tight against your body, not letting them fly out, and not letting your elbows go out past the bars (or chairs).
When it comes to form, make sure your posture is straight, with your back straight. Tilt your body forward slightly, but make sure you don’t arch or slump your lower or upper back.
Hold your head up with your eyes forward, not looking down.
If you’re not used to chest dips, it might be difficult to complete the move all the way. There are some tricks to help you do the move with some alternatives that make it easier, giving you a chance to build up strength to do it properly. Ultimately, performing the move slowly activates your muscles better, but if you can’t do that at first, do the move quickly. That helps you propel yourself with a bit of force (but not too much) to help your muscles while they get stronger.
You can also just go half-way down. It can be very difficult to go all the way down and then pull yourself back up, so there’s no shame in doing half-dips until you’re strong enough to do a full one. The best way to ease into it is by doing 5 half-dips. Once you can do a full one, do that, but keep doing 5 more half-dips. You can do this until you can do a full 5 chest dips and then you can switch to 100% full chest dips.
Strengthen Your Biceps and Triceps
To really target your triceps (that’s the often wobbly area in the back of your upper arms), you can do the tricep dip. It’s VERY similar to the chest dip, you’ll just want to tilt your body forward as you dip down and push back up. Knowing the difference between these two moves will help you squeeze the most out of this potent exercise!
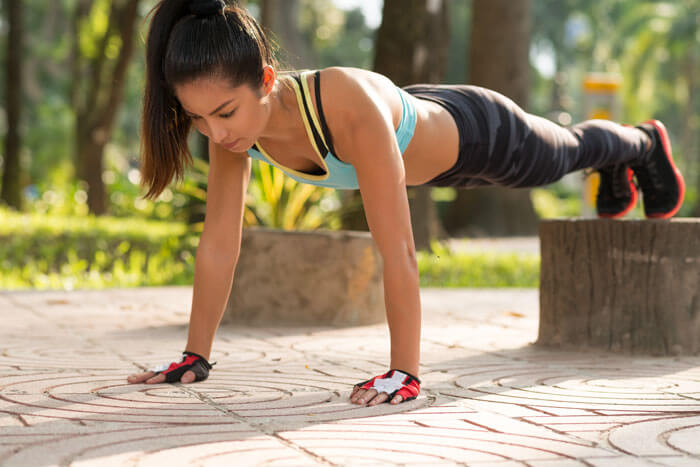
For a truly no-equipment exercise, the standard pushup is your best option to target your whole upper body. Of course, you’ll get much more out of it than just strengthening your biceps: you’ll also get a full-body workout just through this one move.
Since the pushup is one of the most well-known exercises, you probably already know how to do it. However, the form is crucial when it comes to pushups. It’s recommended to match your pushup starting position to that of a plank position. If you don’t use the proper form, you could end up depriving some parts of your body of the activation they need to give you the body you want.
Here are some common mistakes people make when it comes to pushup form.
- They spread their arms out past their body. It’s tempting to do and many beginners do it, especially when they’re just starting out and don’t have the strength to do as many pushups as they’d like. When you spread your arms, you spread the bodyweight out further, making the key muscles work less. That’s when you deprive your body of the results it deserves.
- They spread their legs too far apart. Keep your feet closer together as you can. Spreading them out beyond shoulder-width has the same effect as spreading your arms.
- They stick their butt up in the air. When you arch your butt, you end up straining your shoulders and taking pressure off your core and triceps. This not only deprives your muscle groups of the use and stamina they need to build but actually puts your shoulders in a position they shouldn’t be. That’s just asking for injury!
- They dip their back. Keep your body in a straight line. When your back is sagging, you take all the weight off your lower back and core and put all the strain on your shoulders. Even though it’s the opposite of arching your buttocks, it basically has the same effect on the body as the prior mistake. The point of doing a pushup properly is to evenly distribute the weight across your body. That’s why you get a full-body workout with this move.
Instead of focusing on just the negative side, we’ll also give you some guidelines for what you should do to replace these bad habits.
- Bend your elbows at a 45-degree angle. That’s how you’ll know you’ve gone down far enough, but not too far that your nose or chest touches the ground.
- Engage your core and glutes. Pay attention to what muscles are pulling. The core and glutes should be part of that. You can even squeeze them while you’re doing the workout to get the most out of them during your workout.
- Keep your elbows close to your body. The same rule here goes for doing the chest dip. You want to keep your muscles tight and contained instead of flailing out in awkward positions.
The Core of the Matter
Let’s face it. No one wants to feel the burn in their core, but it’s such an essential part of all-over body strength, 10-minute workout. So it’s unavoidable! To get the best results in your core strength and weight loss, you should do the plank. As with both of our previously mentioned exercises, the execution of this move is crucial. You’ve got to have the proper form to get the most out of it.
Here are the best tips to keep in mind if you want to do the plank the right way.
Never let your hips sag down to the ground. Sagging the hips makes the exercise initially easier, and you will be tempted more than once to cheat a little, especially in the beginning. But a plank with sagging hips is not a plank, and it defeats the purpose of the exercise.
Be sure not to hold your breath. Holding a plank for a long time without enough oxygen can be unhealthy for your brain and lead to dizziness.
Focus your eyes on the ground, find a spot, and stick to it. This is very useful for maintaining a neutral neck position.
Don’t put your hands too close, as it can disturb your balance and run the stability necessary for the proper form of a plank.
Be aware of your belly button! Pull it in and keep it squeezed. Your bellybutton helps flex your abdomen muscles, providing a more demanding workout, which brings more results. To work on your six-pack harder, try and pull your chin down towards your feet at the same time.
Squeezing your kegel muscle is similar to flexing your belly button. Kegel squeezes draw pelvic muscles up, and the effects of doing this can be noticeable in your bedroom performance.
Make sure to hold your chest and abs tight for the entire duration of your plank. Keep your thighs activated. In time, that will help you feel every inch of your body and better understand how your core muscles work together. Finally, it will improve your overall balance.
When you’re not able to hold the pose correctly, it’s time to stop. You’re only benefiting from the position as long as you maintain the proper form, which makes sure you are actually doing the plank.
Allow yourself enough time to rest. An average pause between planks is a minute or so, but a beginner may need more than that.
Plank Variations for Optimal Results
For the best results, don’t just end with the basic plank. You should also be doing side planks as well.
To do a side plank, move to your side, so that just one hand is supporting the motion. Your arm should be directly under your shoulders – not too far, not too close. Your left ankle should cross over your right ankle so that only your right ankle touches the ground.
Keep your body straight, with your hips all the way up in the air. As you hold the plank longer and longer, you’ll be tempted to dip it down for a break, but that’s cheating!
You have a couple options for what to do with your left hand. You can put it on your hips (as in stern mode) for stabilization. You can also hold it high up in the air above your head, fully extended.
For a third (and the most difficult) option, start by holding it high above your head, then slowly move it over and down, to cross your body and touch the opposite side of your torso. Then bring it back up to your head and repeat this motion while you hold the plank.
Legs, Legs, Legs
If you don’t have any weights at all, it is a bit more difficult to get a good leg workout in. Many regimens recommend squats, lunges, and other basic leg workouts, but the best way to get the most bang for your buck is by adding a jump. That’s why we recommend the squat jump and the jumping lunges for your legs. They act as a HIIT exercise, boosting your heart rate while crushing your muscles.
The concept is simple, but actually doing it is not quite so easy.
Squat Jumps
Go down into your squat. Keep your heels driven into the floor, your back and core straight, your eyes looking straight ahead. Go down as deep as you can so your knees are fully bent.
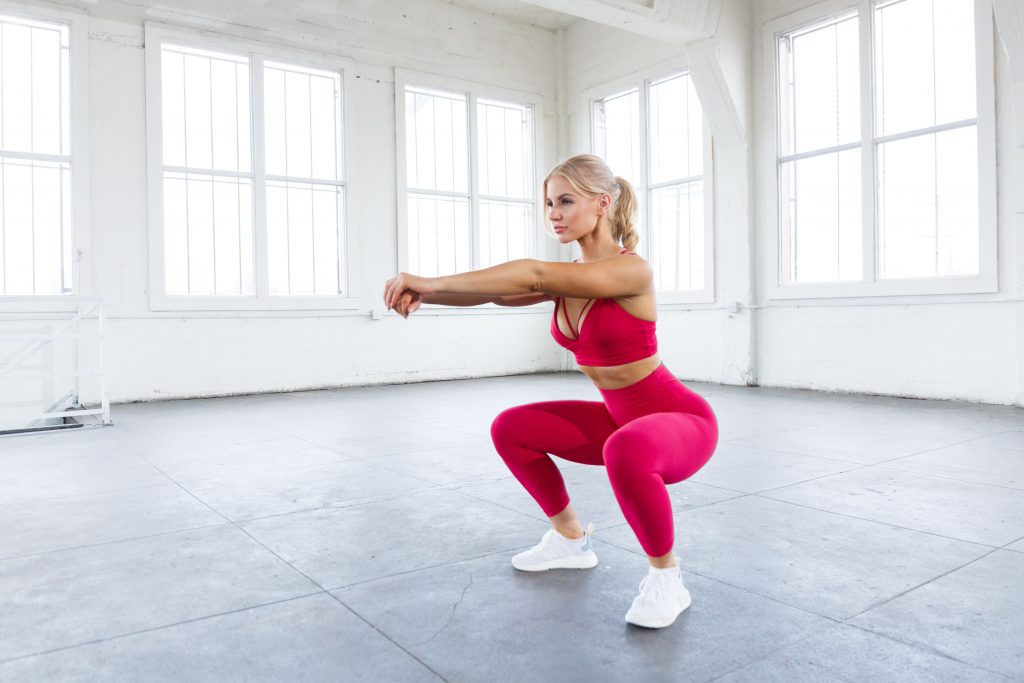
As you come up, do it forcefully, with a jumping motion. Hold your arms high above your head to stretch out your core and to help you jump as high as you can. When you come back down, go right into the next squat and repeat the motion to reach your goal set.
Jumping Lunges
Line up the lunge as you would with the regular version. Your toes should point forward, your heel should stabilize directly behind the body. Keep your core tight and your shoulders back.
Go down into the lunge, reaching your front knee almost to the ground. But when you come up, speed it up with momentum and move right into the next lunge with your opposite leg.
For this plyometric exercise, there’s no middle ground and no stopping point. You go from one lunge to the next very quickly. Just be sure you always keep your form in excellent shape.
How to Implement This Fitness Routine
With an at-home workout, you have to have the discipline to strengthen your fitness level on your own. By breaking each of these workouts into 2.5-minute segments, that goal becomes much more achievable. To make it even more doable and effective, divide the workout in half and do two full rounds of it. Do each exercise for 1.25 minutes (you’ll feel that .25 difference when your muscles are screaming). Then repeat the process one more time.
If you’re still having trouble staying motivated, try one of our at-home fitness challenges for accountability with a personal trainer!
Note: Want our elite trainers to build your workouts for you? Start your Fitplan free trial today!